
FROM CLAY TO bronze
I've been regularly asked about the lost was lost-wax bronze process. Common on every continent, except Australia, the lost-wax method dates from the Red millennium BC and has sustained few changes since then. Here is a simplified summary of this process.
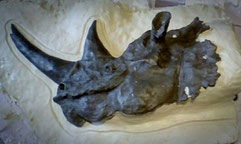
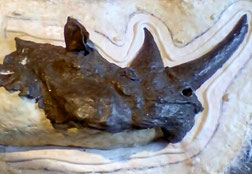
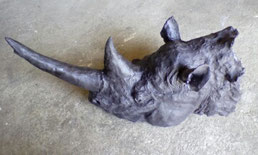
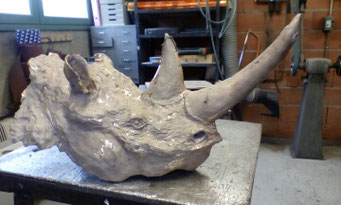
As an example, here is the original clay sculpture of a rhino. First step is to determine the separation lines of the mold that will ensure a safe removal of the clay sculpture and the of the wax copy without any damages.
Applying of the elastomere. Three layers on each face will be required.
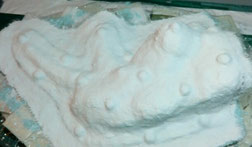
Application of synthetic plaster to form the shell in two layers of 1.5 cm of thickness. Some "keys" are strategically placed to ensure a perfect fit of the two halves of the mold when closed.
Same process will be applied to the second face of the piece.
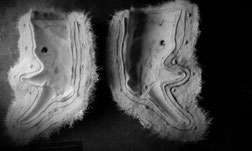
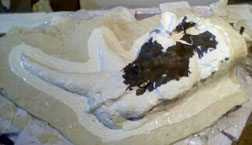
The original piece is taken out of the mold to show a negative form of the piece.
The hot wax is applied first with a brush
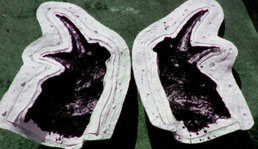
When both halves of the mold have received two coats of wax, the mold is closed. It will then be poured and emptied twice with hot wax to ensure the "gluing" of the two parts.
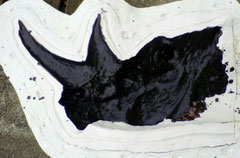
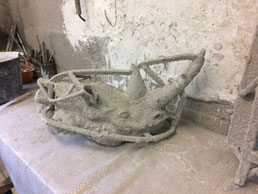
The mold is open and the wax copy removed and ready to go to the foundry for the next steps.
A pouring "cup" and a network of wax pipes, called sprues and gates, are attached to the piece. They enable the molten was to flow evenly throughout the mold and also let the gases air escape as the bronze is poured.The ideal thickness of the wax is of 2 to 3 mm, which will be that of the final bronze.
A fire resistant mix is then applied in 7 layers to create a new negative mold capable of supporting the molten bronze.
This new mold will then be fired for long hours to harden it and in the process, the wax will melt and flow out of the mold, entirely burnt, leaving a space in the fire-resistant mold that the molten bronze will later occupy.
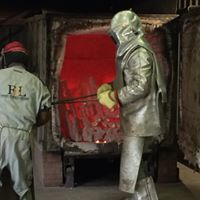
This mold are taken out of the kiln still extremely hot in order to avoir a thermal shock when the molten bronze will be poured.
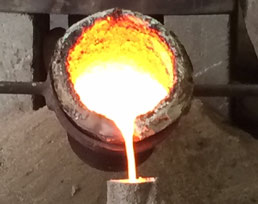
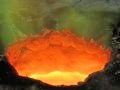
The bronze is poured (always beautiful to see) and the piece will then be let to cool down.
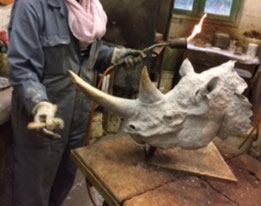
Once it's cold, the refractory "crust" is removed, the crates and sprues are sawn off of the raw bronze piece appear. At this stage it doesn't look that good but many operations are still to come...
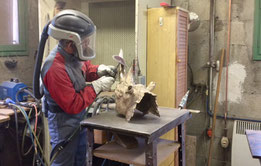
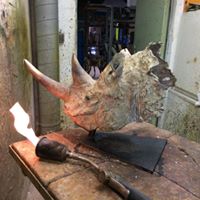
Here comes a very important step called "chiseling". This is when every little imperfection can be repaired, when the chiseling of the piece is corrected or enhanced.
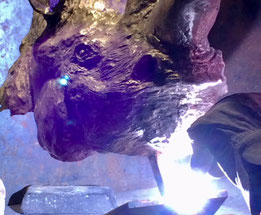
Pedestal welding
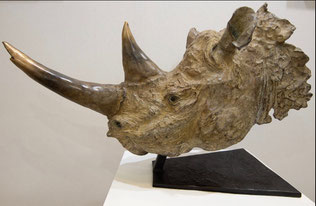
Once the chiseling operations are achieved to satisfaction, the piece is ready for patina.
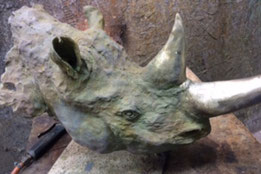
A patina not only protects the sculptures but also gives it colour. It is a step in the making of the finished bronze wherein hot or cold oxides are applied to the surface of the metal, creating a thin layer of corrosion. Here we used copper nitrate that gave a greenish base.
Then a light grey layer was applied carefully to let some of the greenish shades of our first patina subtly appear.
We then applied on the cold piece, some brown/black waxes strategically and delicately to enhance the irregularities of the surface and the different volumes.
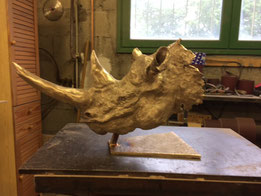
As I like, whenever possible, to let the bronze appear on my pieces, we've been working on the horns to have the bronze subtly emerging from the patina.
Old Kangombe, the Namibian veteran, is now ready for the show !